Thursday, December 22, 2011

"Girlfriend" Gifts


Merry Christmas Stamping friends! I'm glad you took a few minutes during this busy time to stop by and see me!

Last night I had dinner with four of my close friends. It was sort of a little "last hurrah" before Christmas. Everyone is so busy so its hard to get more than two friends together in the same place at the same time so I feel very blessed to have been able to be with FOUR !

Anyway, I wanted to give them each a little hand stamped goodie. Just a little love ya kinda thing.
So I started surfing the web and I found this project on Sunny Stampin website. Andrea Walford is a great source of inspiration.
Unfortunately, I am not a member of her site so I was only able to see the picture of the project, no directions. But I was able to come up with my own little take on it. I don't know if its the same as hers but it worked for me and what I wanted to do with it so I guess that is what matters.


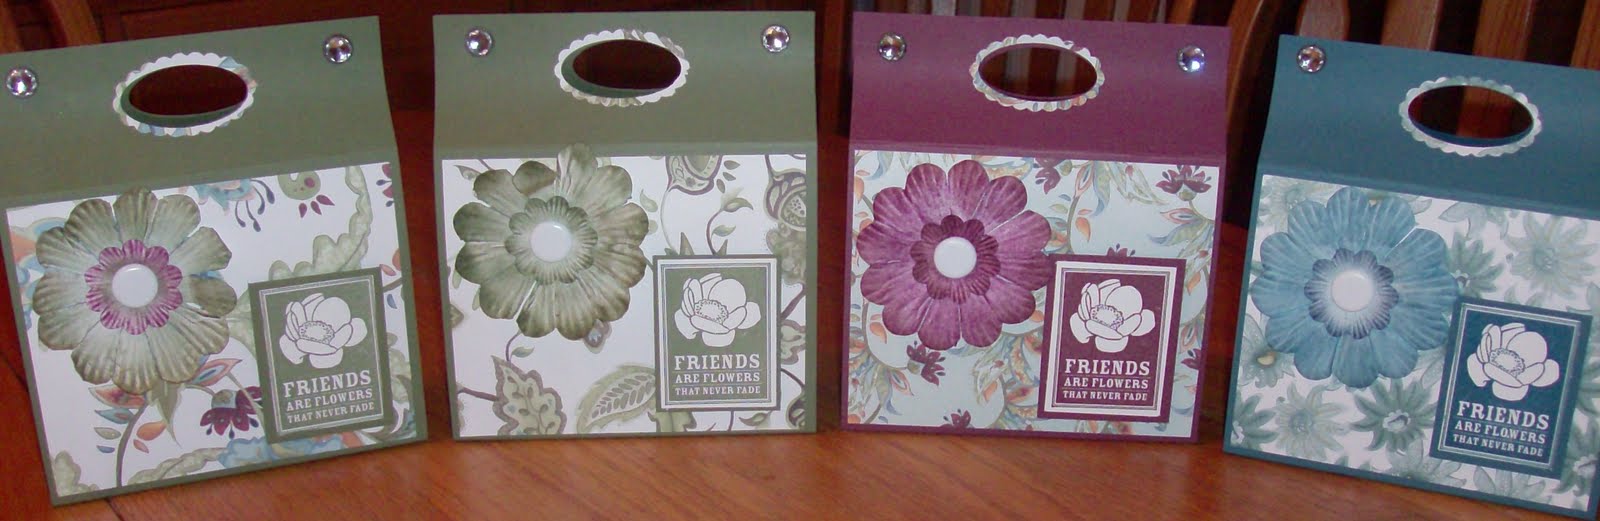
I took pictures of all the outsides, but I neglected to take a picture of the inside. So, I will just have to tell you about the inside. lol

Inside each of these little packages are two bottles that I decorated to match the outside of the package. I filled one bottle with kisses and the other with M&M's. They turned out really cute and were super easy to do!


I used Stampin' Up!s paper flowers and a sponge to make the flowers on the front. LOVE this! It was so easy and I was able to match the flowers perfectly to the designer series paper!
Also, if your a paper hoarder like me, this is a perfect way to use up some of that designer series paper you have laying around. Each box and set of bottles used one full sheet of DSP.
Some extra little touches, I used the large oval punch to punch the handle and then added the scallop punch around it and also, to hold it shut, I used some gem brads! Oh, and if you look at the centers of the flowers, I used jumbo brads to hold them together.
I hope you enjoyed this post and if you have any questions, feel free to email me or leave a comment on this post. I will do my best to answer them!
Until next time,
Merry Christmas!
Now,
GO GET YOUR FINGERS INKY!
Shelly

Wednesday, December 7, 2011

Decorated Paint can

Every December, instead of doing a project at stamp club, we have a Christmas party. We all decorate an empty paint can and fill it with a gift to exchange at our party. We have so much fun with this as we do a Chinese Auction. It gets pretty wild sometimes when there is a REALLY GOOD gift! lol


So I thought I would share with you MY paint can that I decorated this year.


I took the snow burst embossing folder (124096) from the Holiday mini catalog and embossed two sheets of Night of navy card stock. I used the red tape to adhere it to my bucket. Then I stamped the trees from lovely as a tree (115026) along the bottom of some whisper white card stock. I used a finger dauber and added some green to the grassy area and a


sponge to add some light blue to the sky area. I added that to the paint can. Then I cut the scallop strip using the tasteful trim die(120893) and my big shot. I used the silver glitter paper(124005) and Naturally Serif (113453) to cut the words "Merry Christmas" and added them with mini glue dots. I cut the snow flakes out using the Snow flakes #2 sizzlits (113449) and added them randomly around the can. These pictures don't do the snow flakes and letters justice!
I made two huge lollies and added a snow flake to the top to cover the lid. I'm still working on perfecting the lollies...I'm not so good at them yet but you know what they say, practice makes perfect! If you look really closely, you can see the gem in the center of the snowflakes.


Here is a close up of the letters and snow flakes so that you can see a little more detail.

I also added the gems to each of the scallops.

I think the paint can turned out pretty nicely. If I can just master those lollies now! LOL


Until next time,

GO GET YOUR FINGERS INKY!

Merry Christmas!

Shelly

Tuesday, December 6, 2011

Tis the season!


Its that time of year again, when we are desperately searching for the perfect gift for each person on our gift list. Unfortunately, as much as I would love to be able to get everyone exactly what they want, it is just not possible! So, the solution..... Gift cards! I fought the idea of gift cards for years and years. I just felt like they were so impersonal and made me feel like the person giving it didn't care enough to take the extra time to find that perfect gift.
Well!!! Let me tell you, now that I have two teenage boys living with me, I see gift cards in a WHOLE NEW LITE!!!! lol

I constantly cruise the information highway looking for ideas for projects and I came across this one. ( If you know whose original idea it is, please let me know and I will give them credit. )

It is a gift card holder, Christmas card and box of chocolate all wrapped up in one sweet little package!

I did a "last minute mini class" on these this past weekend and I think the guests all loved the idea and several of them have already started recreating them in mass quantities for those last minute, unexpected guests and office workers gifts!


I think they would also make the perfect Teacher Gift, Mail carrier gift, hair dresser gift ect!

And you don't have to stop at Christmas either! They can be modified for birthday gifts or just cause you love me gifts! Ohhh Valentines day is just a few months away... The possibilities are endless~!

I hope you have a Very Merry Christmas!
Until next time,
GO GET YOUR FINGERS INKY!
Shelly